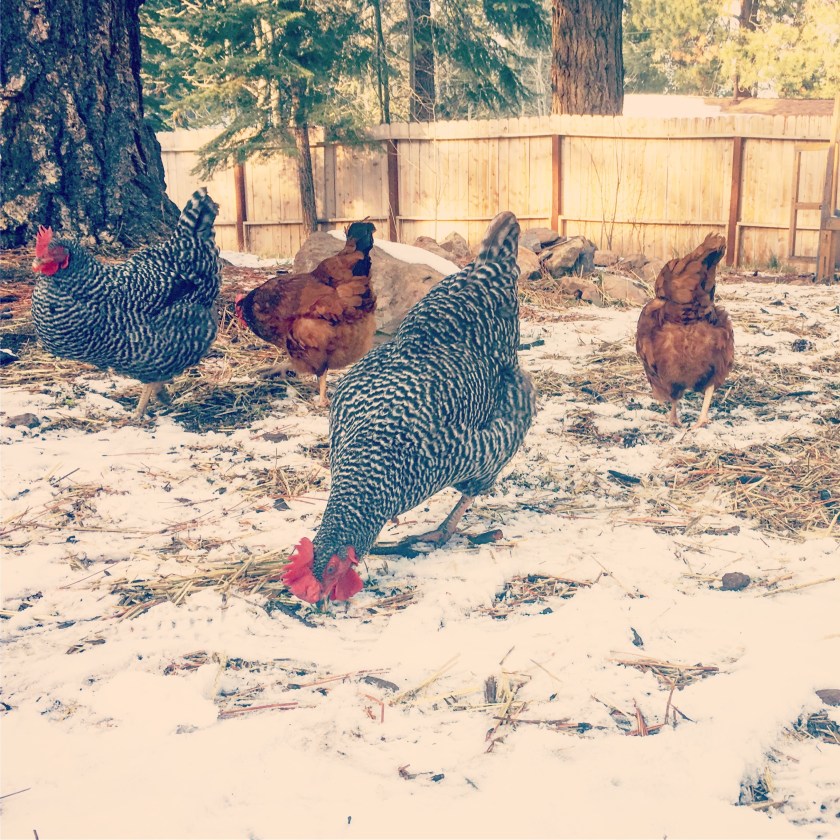
{this moment} – A Friday ritual. A single photo – no words – capturing a moment from the week. A simple, special, extraordinary moment. A moment I want to pause, savor and remember. If you’re inspired to do the same, leave a link to your ‘moment’ in the comments for all to find and see. {inspired by Soule Mama}
It’s a slow grilled rump roast!Fathers Day called for a special dinner for our hard working Papa.
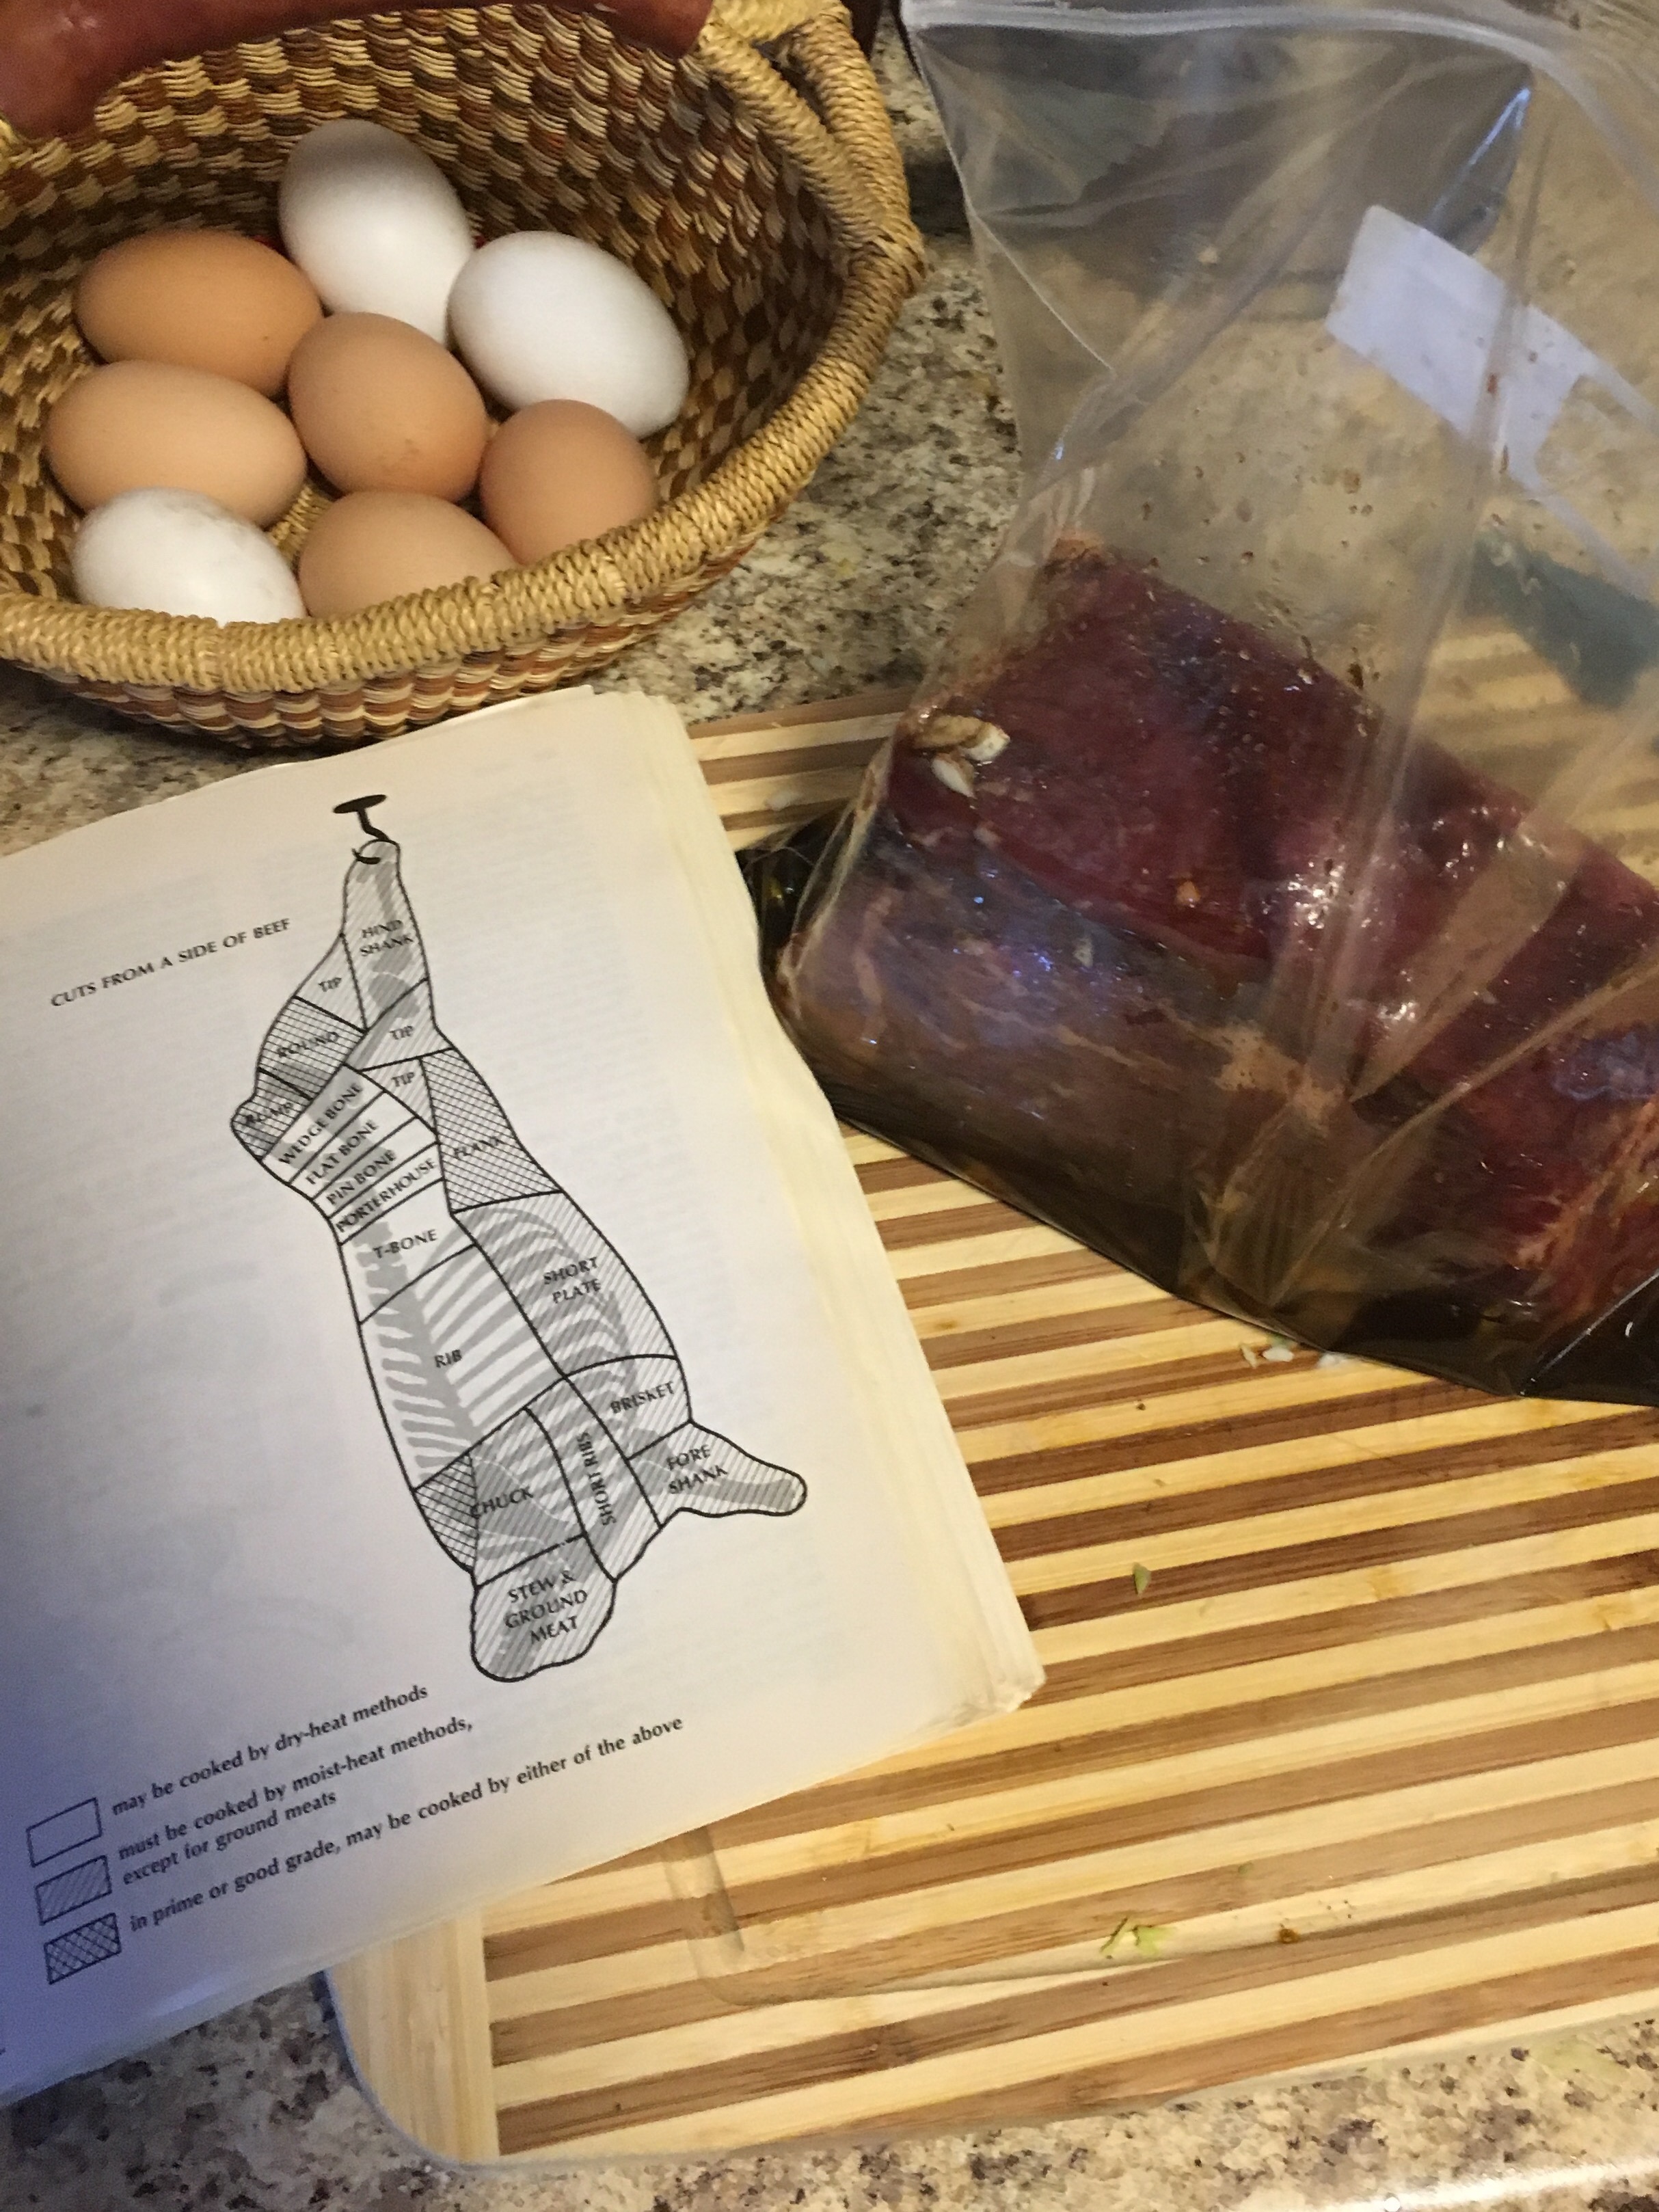
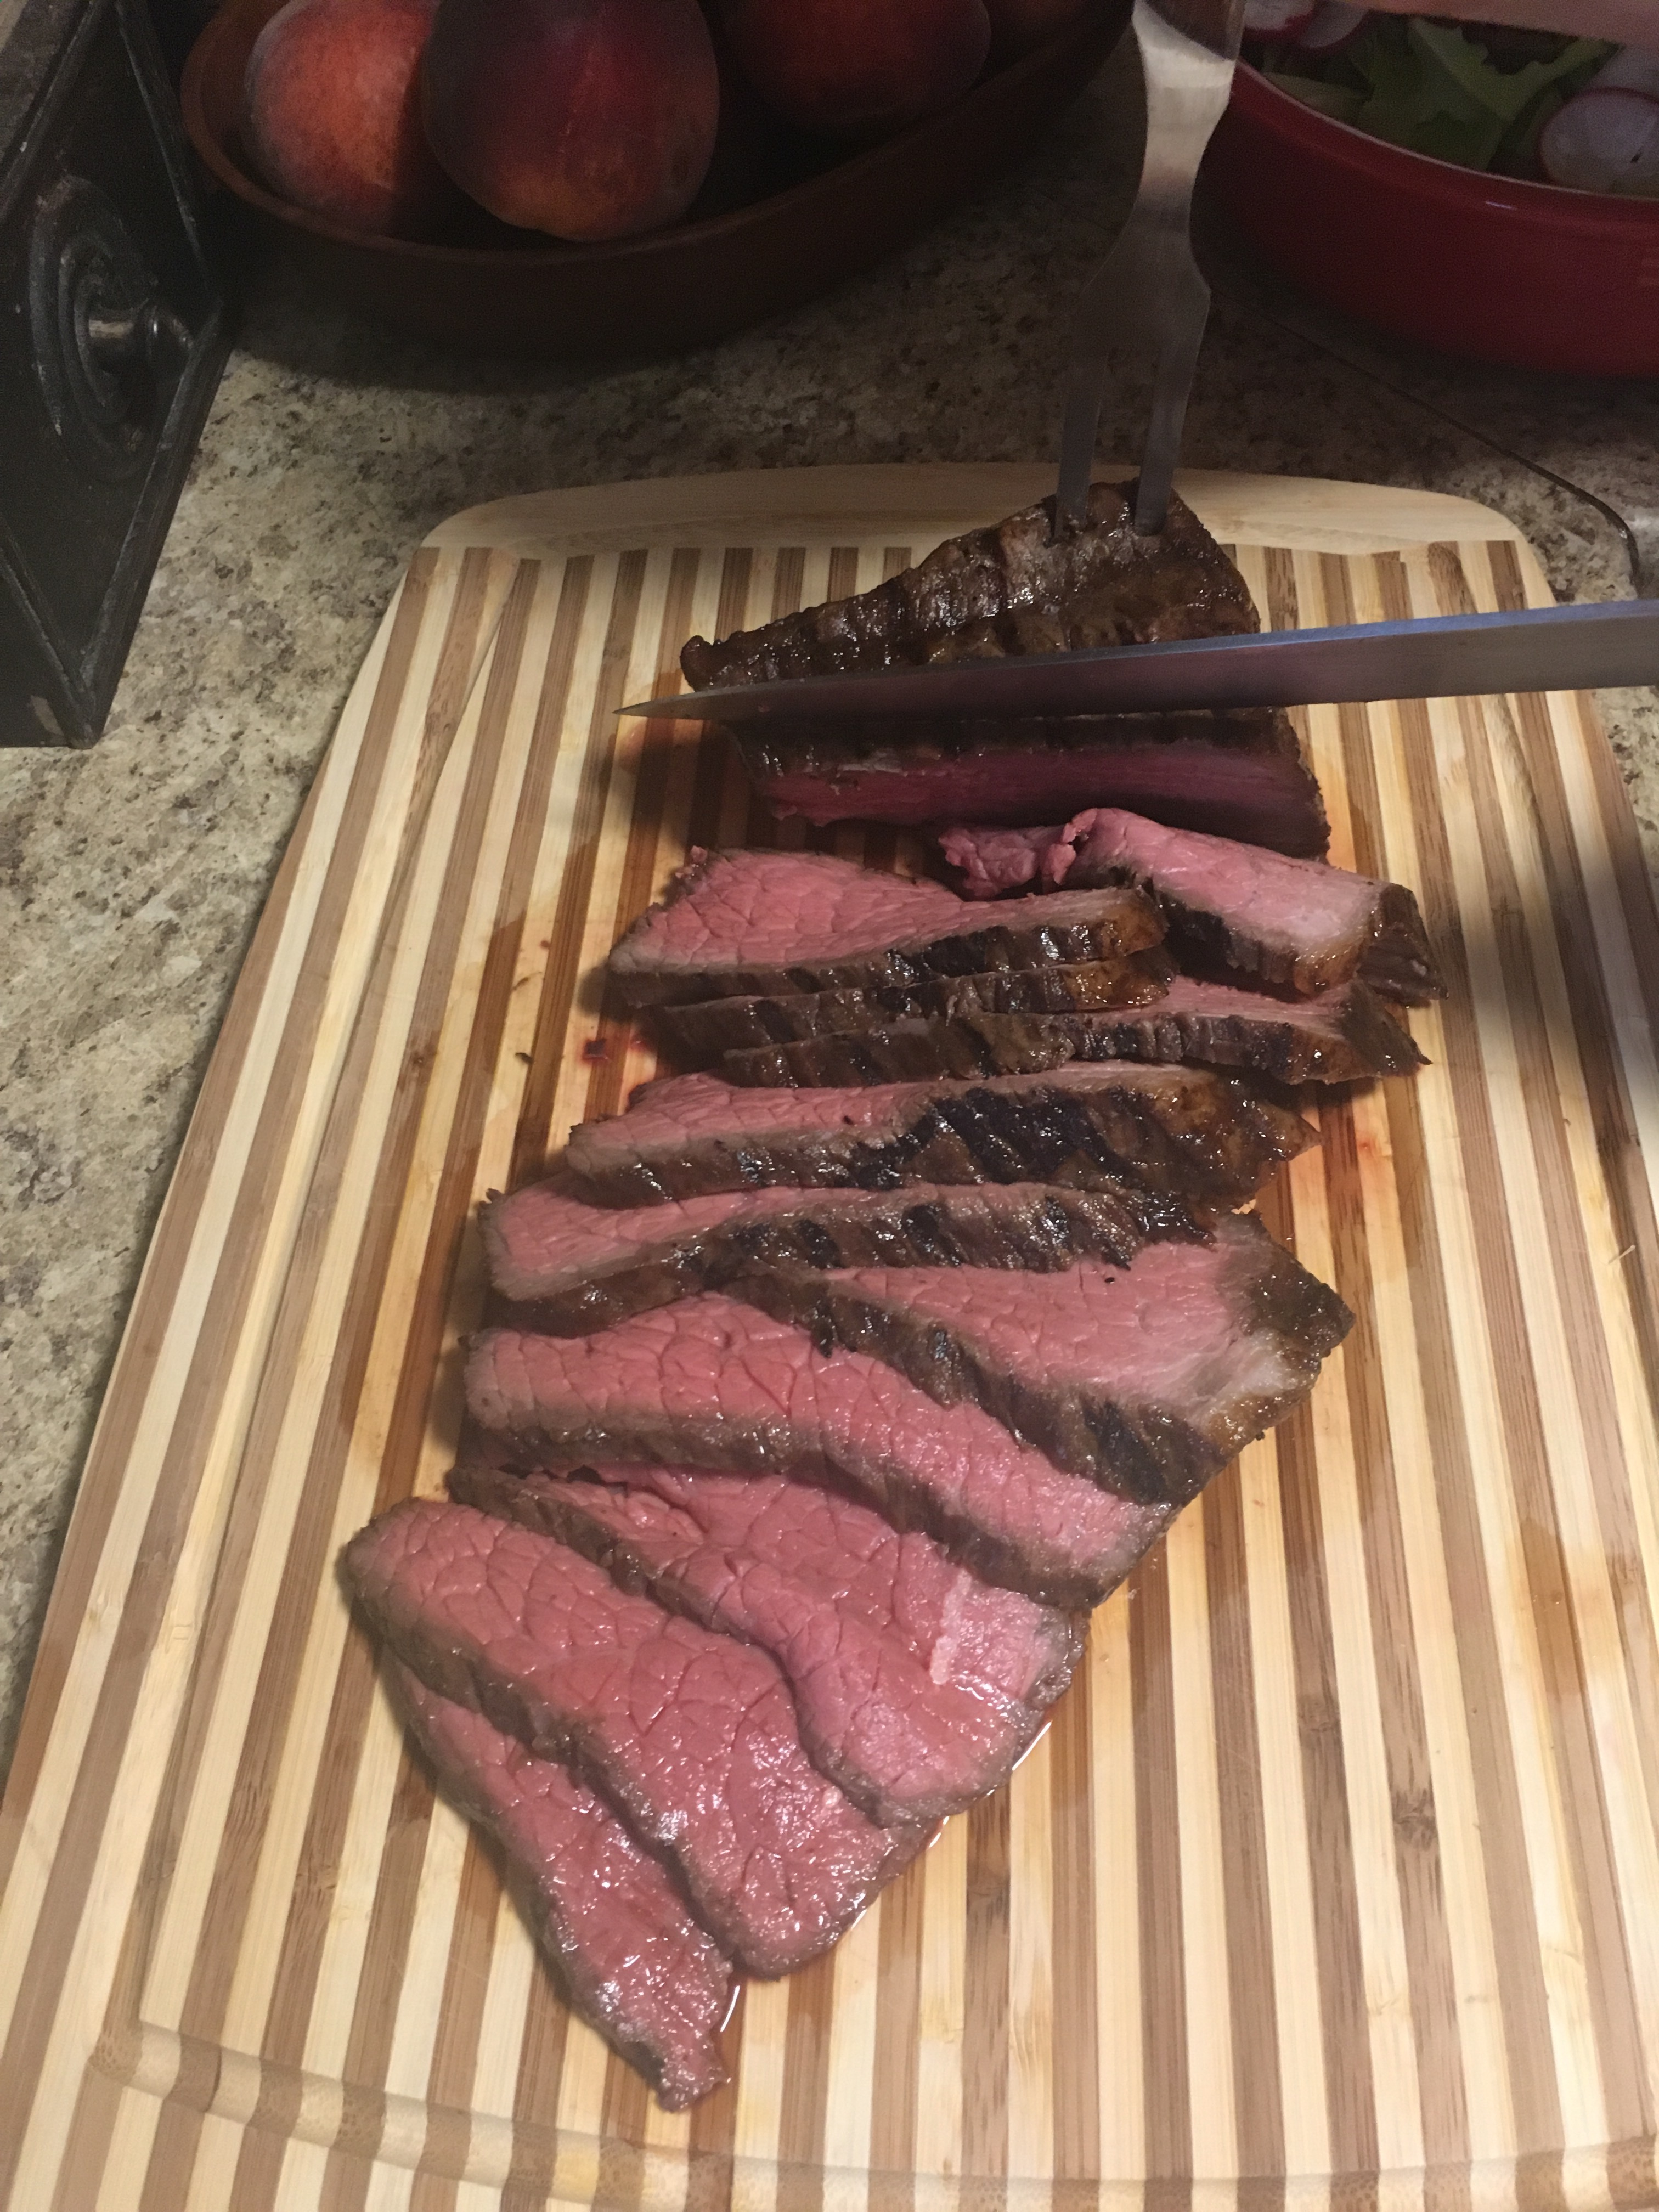
I work for the ranch and we have amazing steaks at the ready, but we also like to mix it up and try out all the options year round. It’s been too hot to turn on the oven and I felt a crock pot recipe not special enough to honor dad, I do tend to use the crock pot a lot. So while Papa took the kids to the river, I decided to slow grill a rump roast. Now these can be hit or miss, but I do find the roast that is heavy on the fat works well, as well as marinating, basting and indirect heat are key for a tender roast. You can try this with rump, cross rib, and chuck roasts. They all have a great value and can serve a crowd. A few secrets…you have to pull the roast off the heat when at the thickest point, the internal temperature reaches 140F and you have to let it rest 10-15 minutes covered with foil, you’ll thank me. Referring to the Joy of Cooking aka bible
Saturday night I took the defrosted roast and placed in the marinated. Then Sunday at 3pm I started it on the grill…so by 6pm we had a delicious dinner. Next time I’d do the marinated for two days, but at least you know this can be done within 24 hours. Now if you’d rather save time, cut up the roast into 1 inch cubes before adding it to the marinated. Then you can take the cubes and put onto kebab sticks with some bell pepper and onions! This is an especially good idea when camping.
Nom Nom Slow Grilled Rump Roast
2.5-3.5 lbs rump roast (cross-rib or chuck)
1/2c olive oil
1/4c balsamic vinegar
1/4c maple syrup
3-5 garlic cloves minced
1 teaspoon salt
1 tablespoons ground pepper
1 tablespoon Worcestershire sauce
1 tablespoon prepared horseradish
Combine the marinate ingredients. Add the roast and let rest in the refrigerator for 12-24 hours rotating it every so often to evenly coat the meat with marinated. (If you’re choosing to do kebabs, cut up the roast into 1 inch cubes before adding it to the marinated, the beef will only need 6-12 hrs in it to tenderize and season)
Prepare your grill by heating it up to 400 F then if it’s a gas grill turn one side off, this is where the meat will go, hence indirect heat! Take the time to sear too bottom and all the sides, get some good grill marks, and it should less then a minute per side! By now when you close the grill it should be at a 250 F temp with half the burners going on a low-medium flame. (If using a charcoal grill, fire it up then move the coals to one side, the roast should have no coals under it)
Baste the roast with marinated and turn it every 30mins. It will take roughly 20-30minutes to cook per pound, my roast took just under 2 hours. You’ll check your roast with a meat thermometer at the thickest point, when it reaches 140F internally, remove from heat and cover with foil to rest for 10-15 minutes.
Slice against the grain nice and thin.
{this moment} – A Friday ritual. A single photo – no words – capturing a moment from the week. A simple, special, extraordinary moment. A moment I want to pause, savor and remember. If you’re inspired to do the same, leave a link to your ‘moment’ in the comments for all to find and see. {inspired by Soule Mama}
Not to brag, but I am quite well known for my jerky, and it’s gone fast! My kids love it because it’s easy to shred into bites, my husband loves it cause it’s salty, and I love it because it’s easy, healthy, and I great source of nutrients for my family on the go.
Several years ago, I purchased an Excalibur Dehydrator. I love it! It has five trays and a variety of temperature setting. It can fix up jerkey in 6-8hours, make up fruit leathers, raw vegan treats, dehydrated eggs for baking and meals for backing trips. You won’t regret getting one.
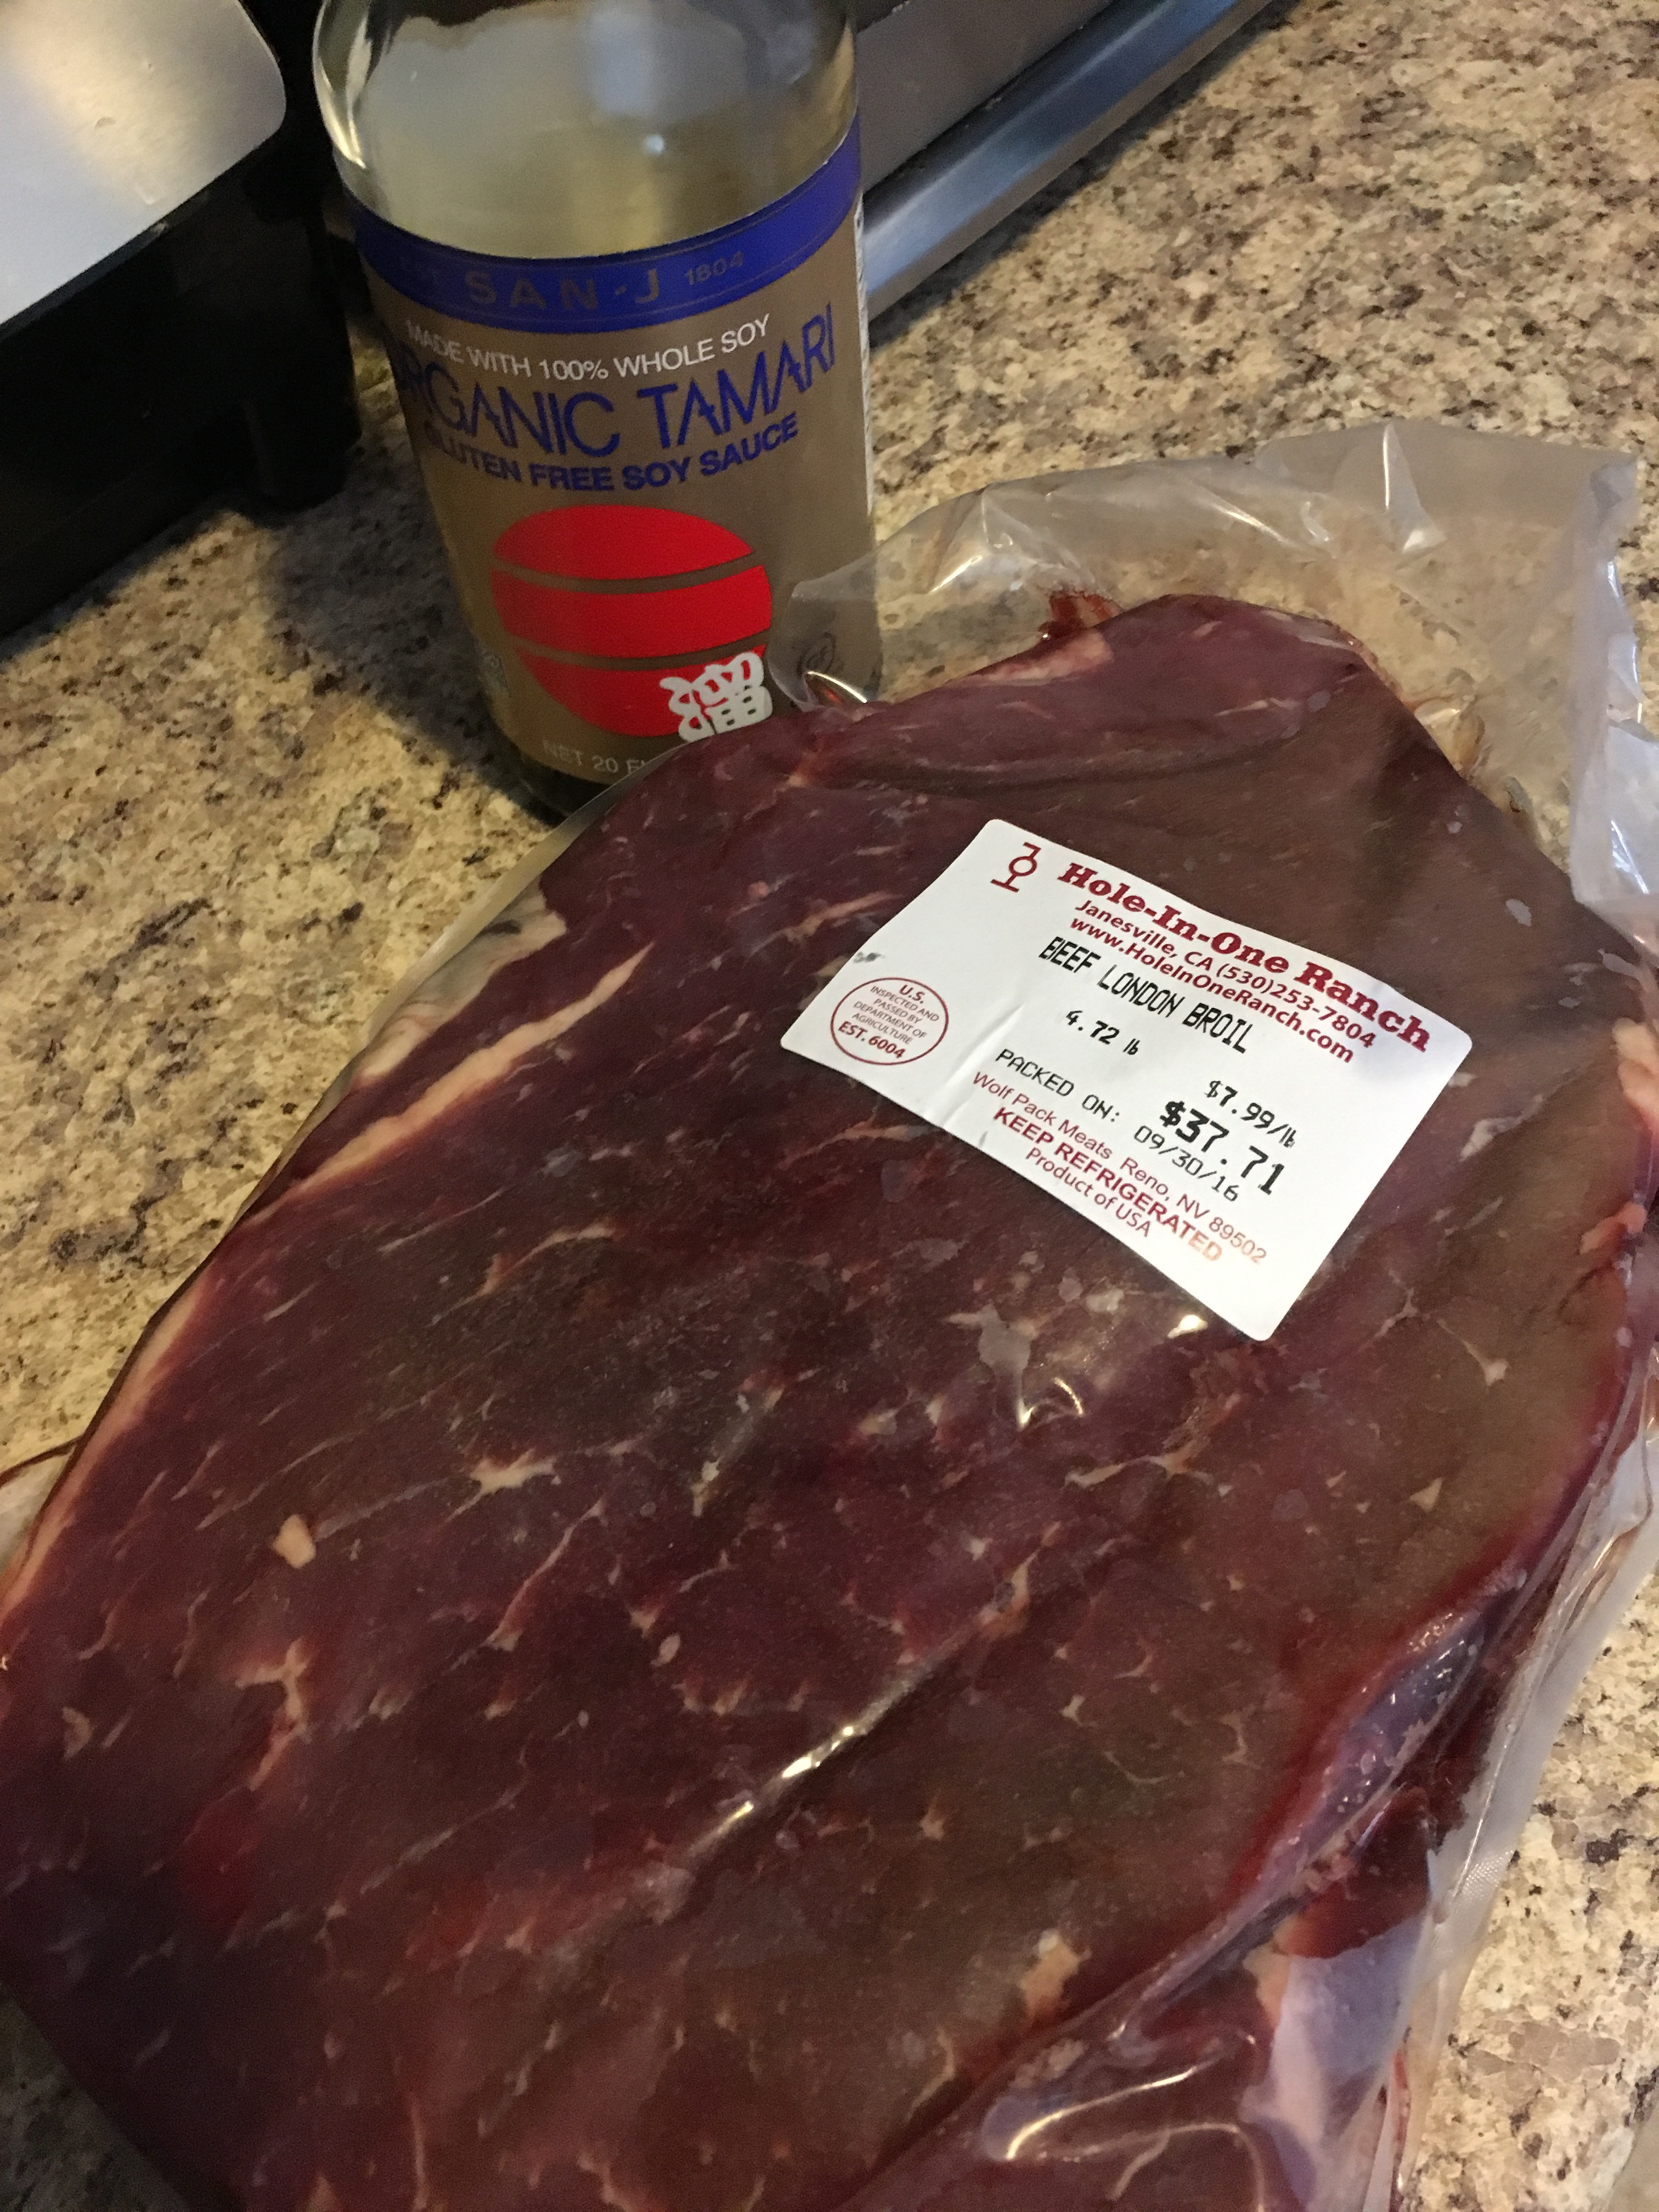
Years ago, Joe, owner of Hole-In-One Ranch, gave me the secret ingredient to my jerky, grass-fed London Broil. It’s lean, it’s large and it soaks up my marinated resulting in salty flavorful beef goodness in every bite.
Jerky! It’s a Hole-In-One
5 lbs Grass Fed/Grass Finished London broil, partially frozen
1 cup Gluten Free Tamari/Soy Sauce (I’ve used Braggs Liquid Amino Acids or Coconut Amionos, even just sea salt and pepper in a pinch with great results)
A Sharp Knife. Really, head to the hardware store and get it sharp!
1. If there’s any medium to large bits of fat, trim it off. Fat will turn your jerky rancid if leftmoutnin warm temperatures. I usually keep this jerky in the fridge in glass jars for a longer shelf life. (And because if I leave it out it’s all anyone eats all day!)
2. Notice in the pictures, for jerky you want to slice with the grain, not against it. Long slices for big jerky strips and as thin as you can make them. As mentioned above, it should be partially frozen, just thawed enough to work with that your hands don’t freeze and you can get nice straight cuts.
3. Place all strips in a large container, I use a rectangular one. Then pour your soy sauce of choice all over and mix and turn meat gently till all is coated. Every few hours I stop by the fridge to give it a turn to ensure even distribution. It will need to marinate for 24-36 hours.
4. Start lining up your trays with jerky strips, giving a little space between pieces to allow for air circulation. At this point if you want to add some fresh cracked black pepper do so! If you don’t have a dehydrator, consider setting up your oven to do the job. You can line baking trays with the meat, or even racks on baking trays, set oven at 170F and follow the rest of directions below.
5. Set dehydrator at 170 degrees. Allow to work a few hours then flip the jerky. At this point some of the smaller bits might be ready and you can sneak those. Let it work for 6-8-10 hours depending on how thin or thick you sliced the meat. You’ll get the hang of it. When the thickest pieces can break apart and aren’t ‘wet’ or ‘raw’ inside, then they’re done.
6. Allow to fully cool. Package in glass jars. Refridgerate or stuff in your back pack and get outside!
Here is my secret, I was a vegetarian 15 years ago. For Real! I was also malnourished. NOT because of the vegetarian diet, but because I had Celiacs and didn’t know it. I was eating whole grain bread, and faux meats whose main ingredient was wheat gluten. 15 years ago there were not endless gluten free options on the shelves for vegetarians or anyone, or menus for gluten free choices at restaurants, your options were salad, rice cakes, beans, and yes meat. So when I found out my vegetarian diet was not for me, I broke my meatless ways with a stick of beef jerky and some apple juice.
I am a huge believer in choose your own food path, and sometimes the path is chosen for you. (Every time I walk past donuts…I wish I didn’t have gluten intolerance) I definitely take my time to explore a variety of healthy eating. We’ve had months in our house being raw vegan, gluten free vegetarian, macrobiotic, paleo, primal…but what it comes down to in our house is we eat gluten free whole grains, organic in season produce, and grass-fed, pastured, and responsibly raised meats. We also have our own chickens for eggs.Our family’s diet is the best for us and we feel good knowing that the beef, pork and lamb we eat, we can source locally from Hole-In-One Ranch. There were a number of years where we didn’t eat pork because we couldn’t locally source a pork product, and did not want to support factory farming-which is where the majority of pork comes from.
Happy Mountain Hens
Eating locally sourced meats, grass pastured raised meats, is best. It may take a little effort in your local area to search them out.
Try internet searching, and websites like www.eatwild.com Lots of ranches have monthly neighborhood deliveries, as well as bulk deals on meats, a freezer stocked reduces trips to the market, especially over the holidays! Thus reducing your carbon foot print driving to and from the market, and gives you more time at home for hobbies or to exercise! (Ask about our deliveries by sending me an e-mail! Or Order Here!)
Ask at local health food stores.
Visit Farmers Markets.
Ask your neighbors and friends! Human interactions are my favorite way to gain knowledge and learn about new ideas, products, and opportunities. You may be surprised when you ask,’ Hey! Where do you buy local meat?’
Pork Chops
When you do find your local farmer, and if budget is of a concern, ask them questions. There are so many more cuts available then what you may be used to if you’ve generally bought meat at a market, and so many way to prepare roasts and ground, to stretch meals! (Hint: Add Veggies and Grains to a pound of ground meats, it’ll feed my family of four with leftovers.)
I hope that you’ll find something to inspire you as you look around on my blog today, and that you can do your part to support your local ranchers and farmers where ever you may be.
{this moment} – A Friday ritual. A single photo – no words – capturing a moment from the week. A simple, special, extraordinary moment. A moment I want to pause, savor and remember. If you’re inspired to do the same, leave a link to your ‘moment’ in the comments for all to find and see. {inspired by Soule Mama}
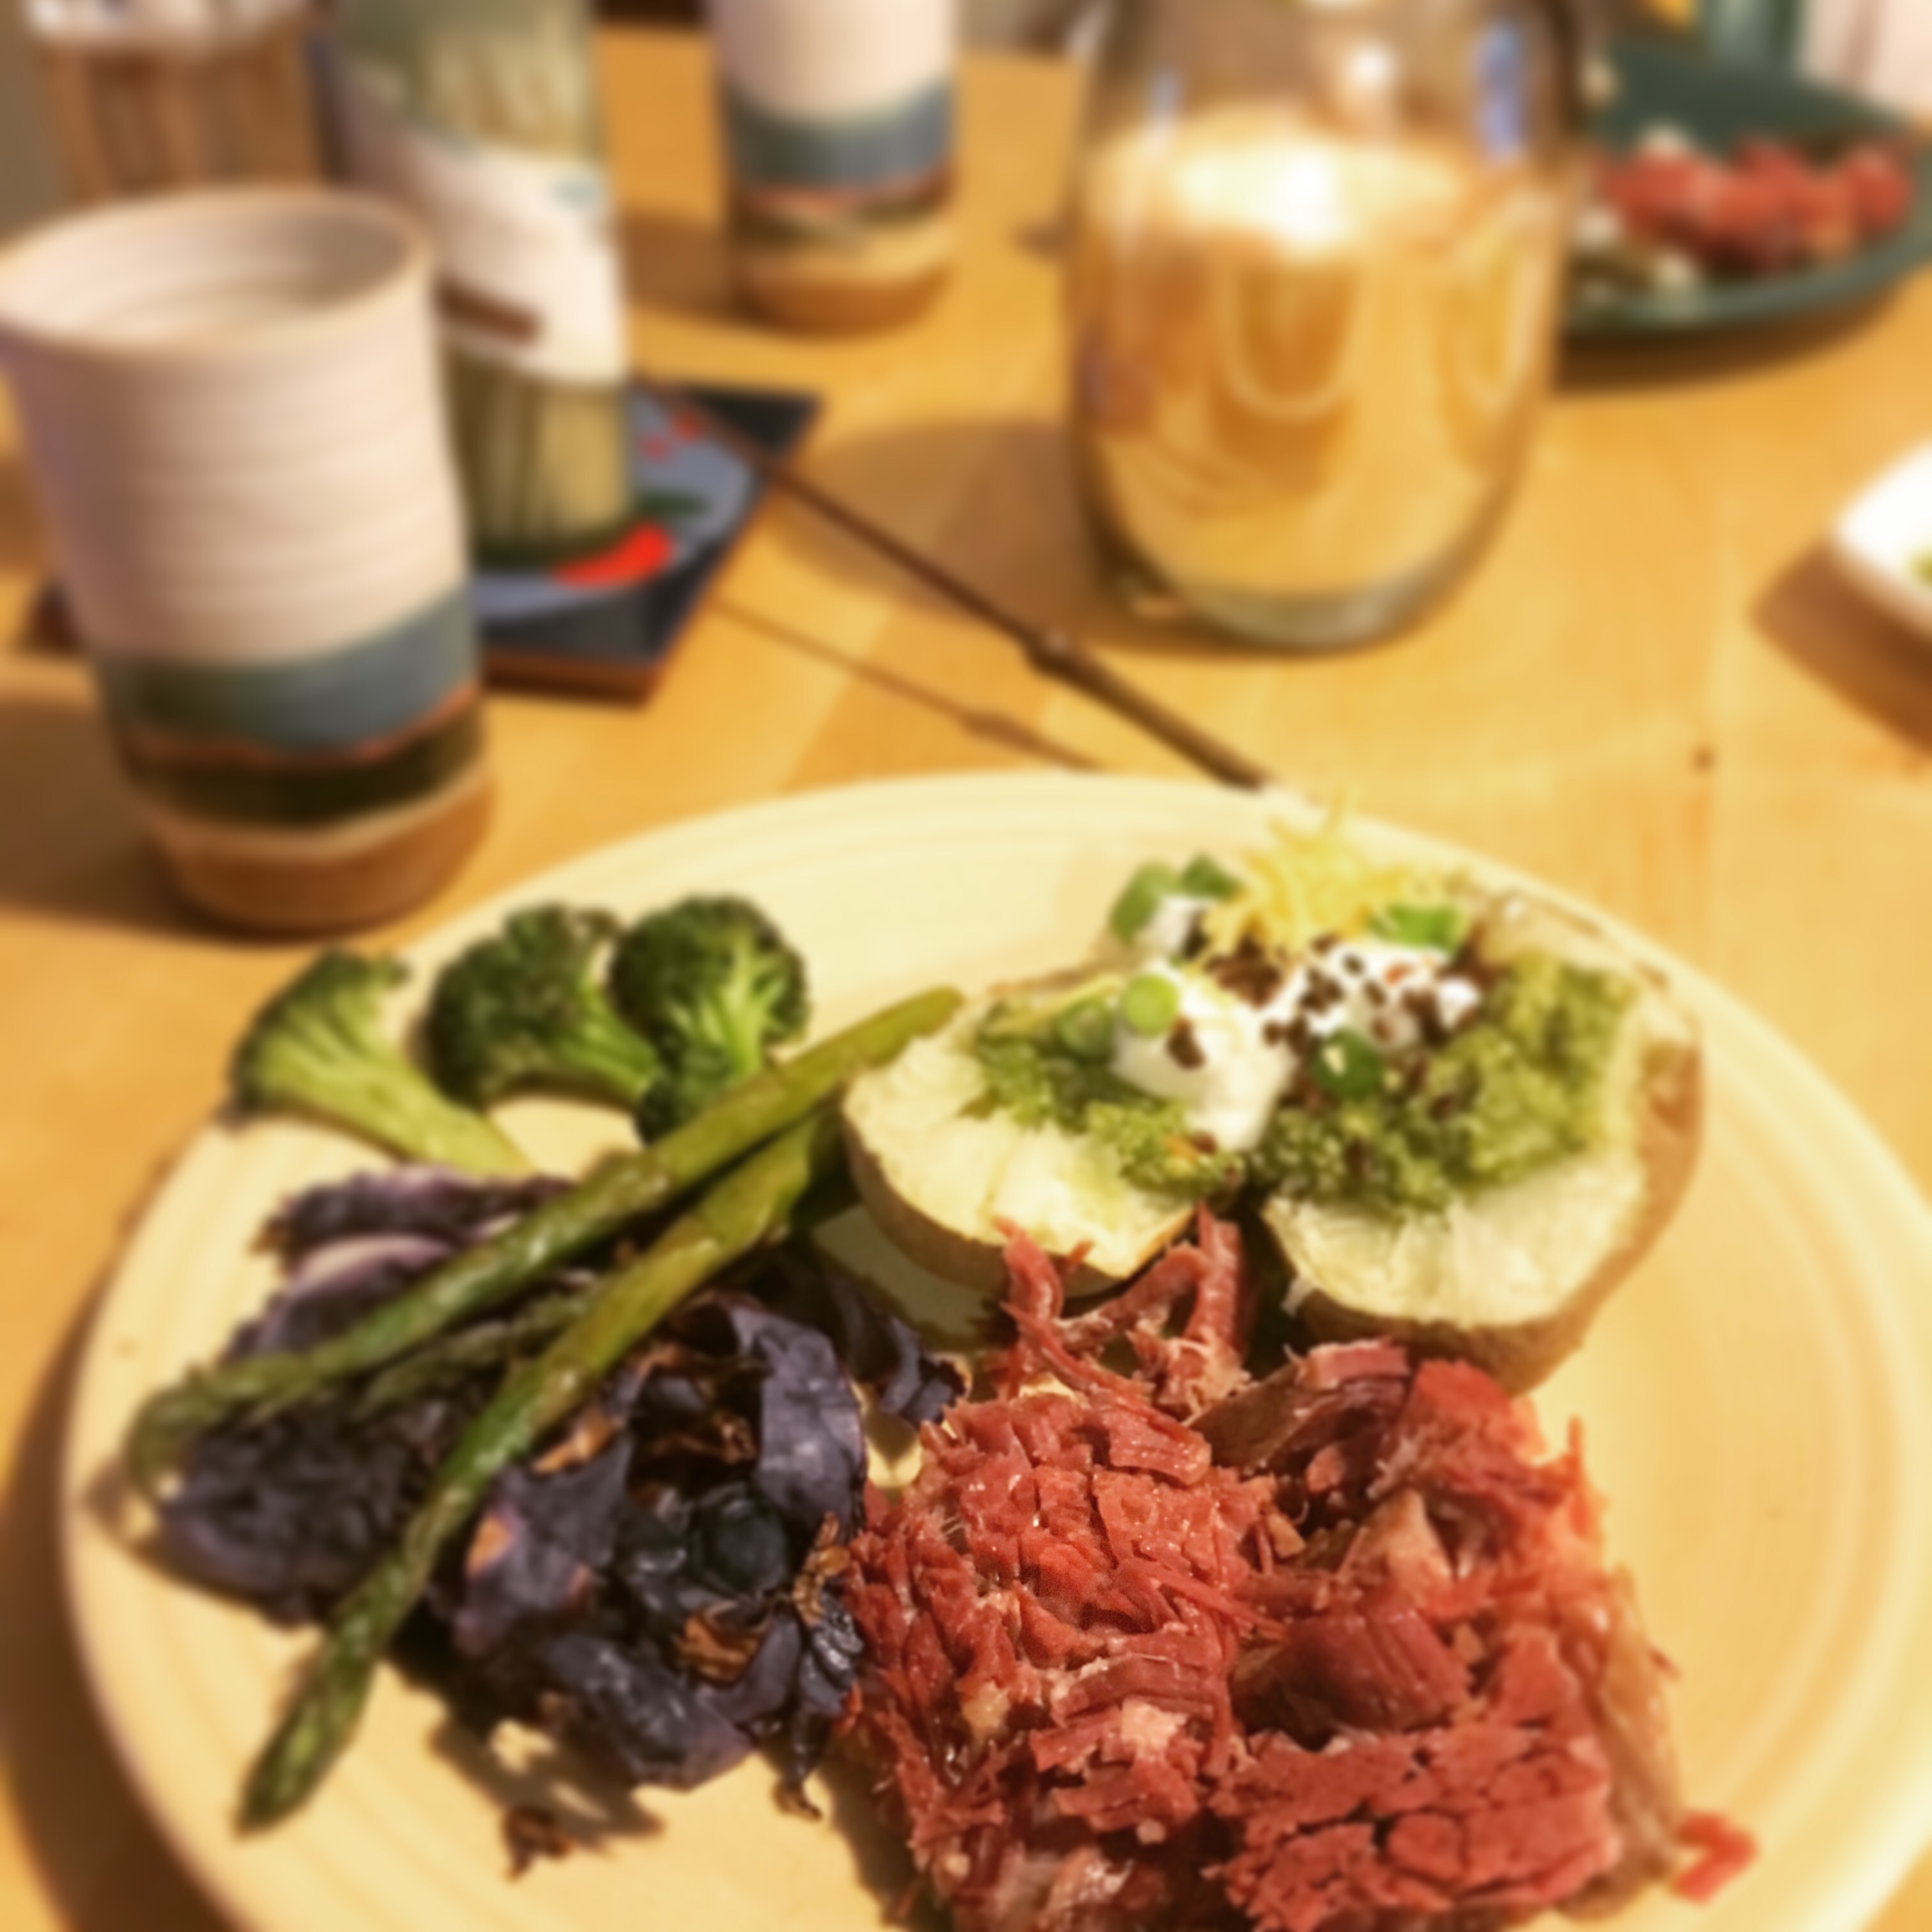
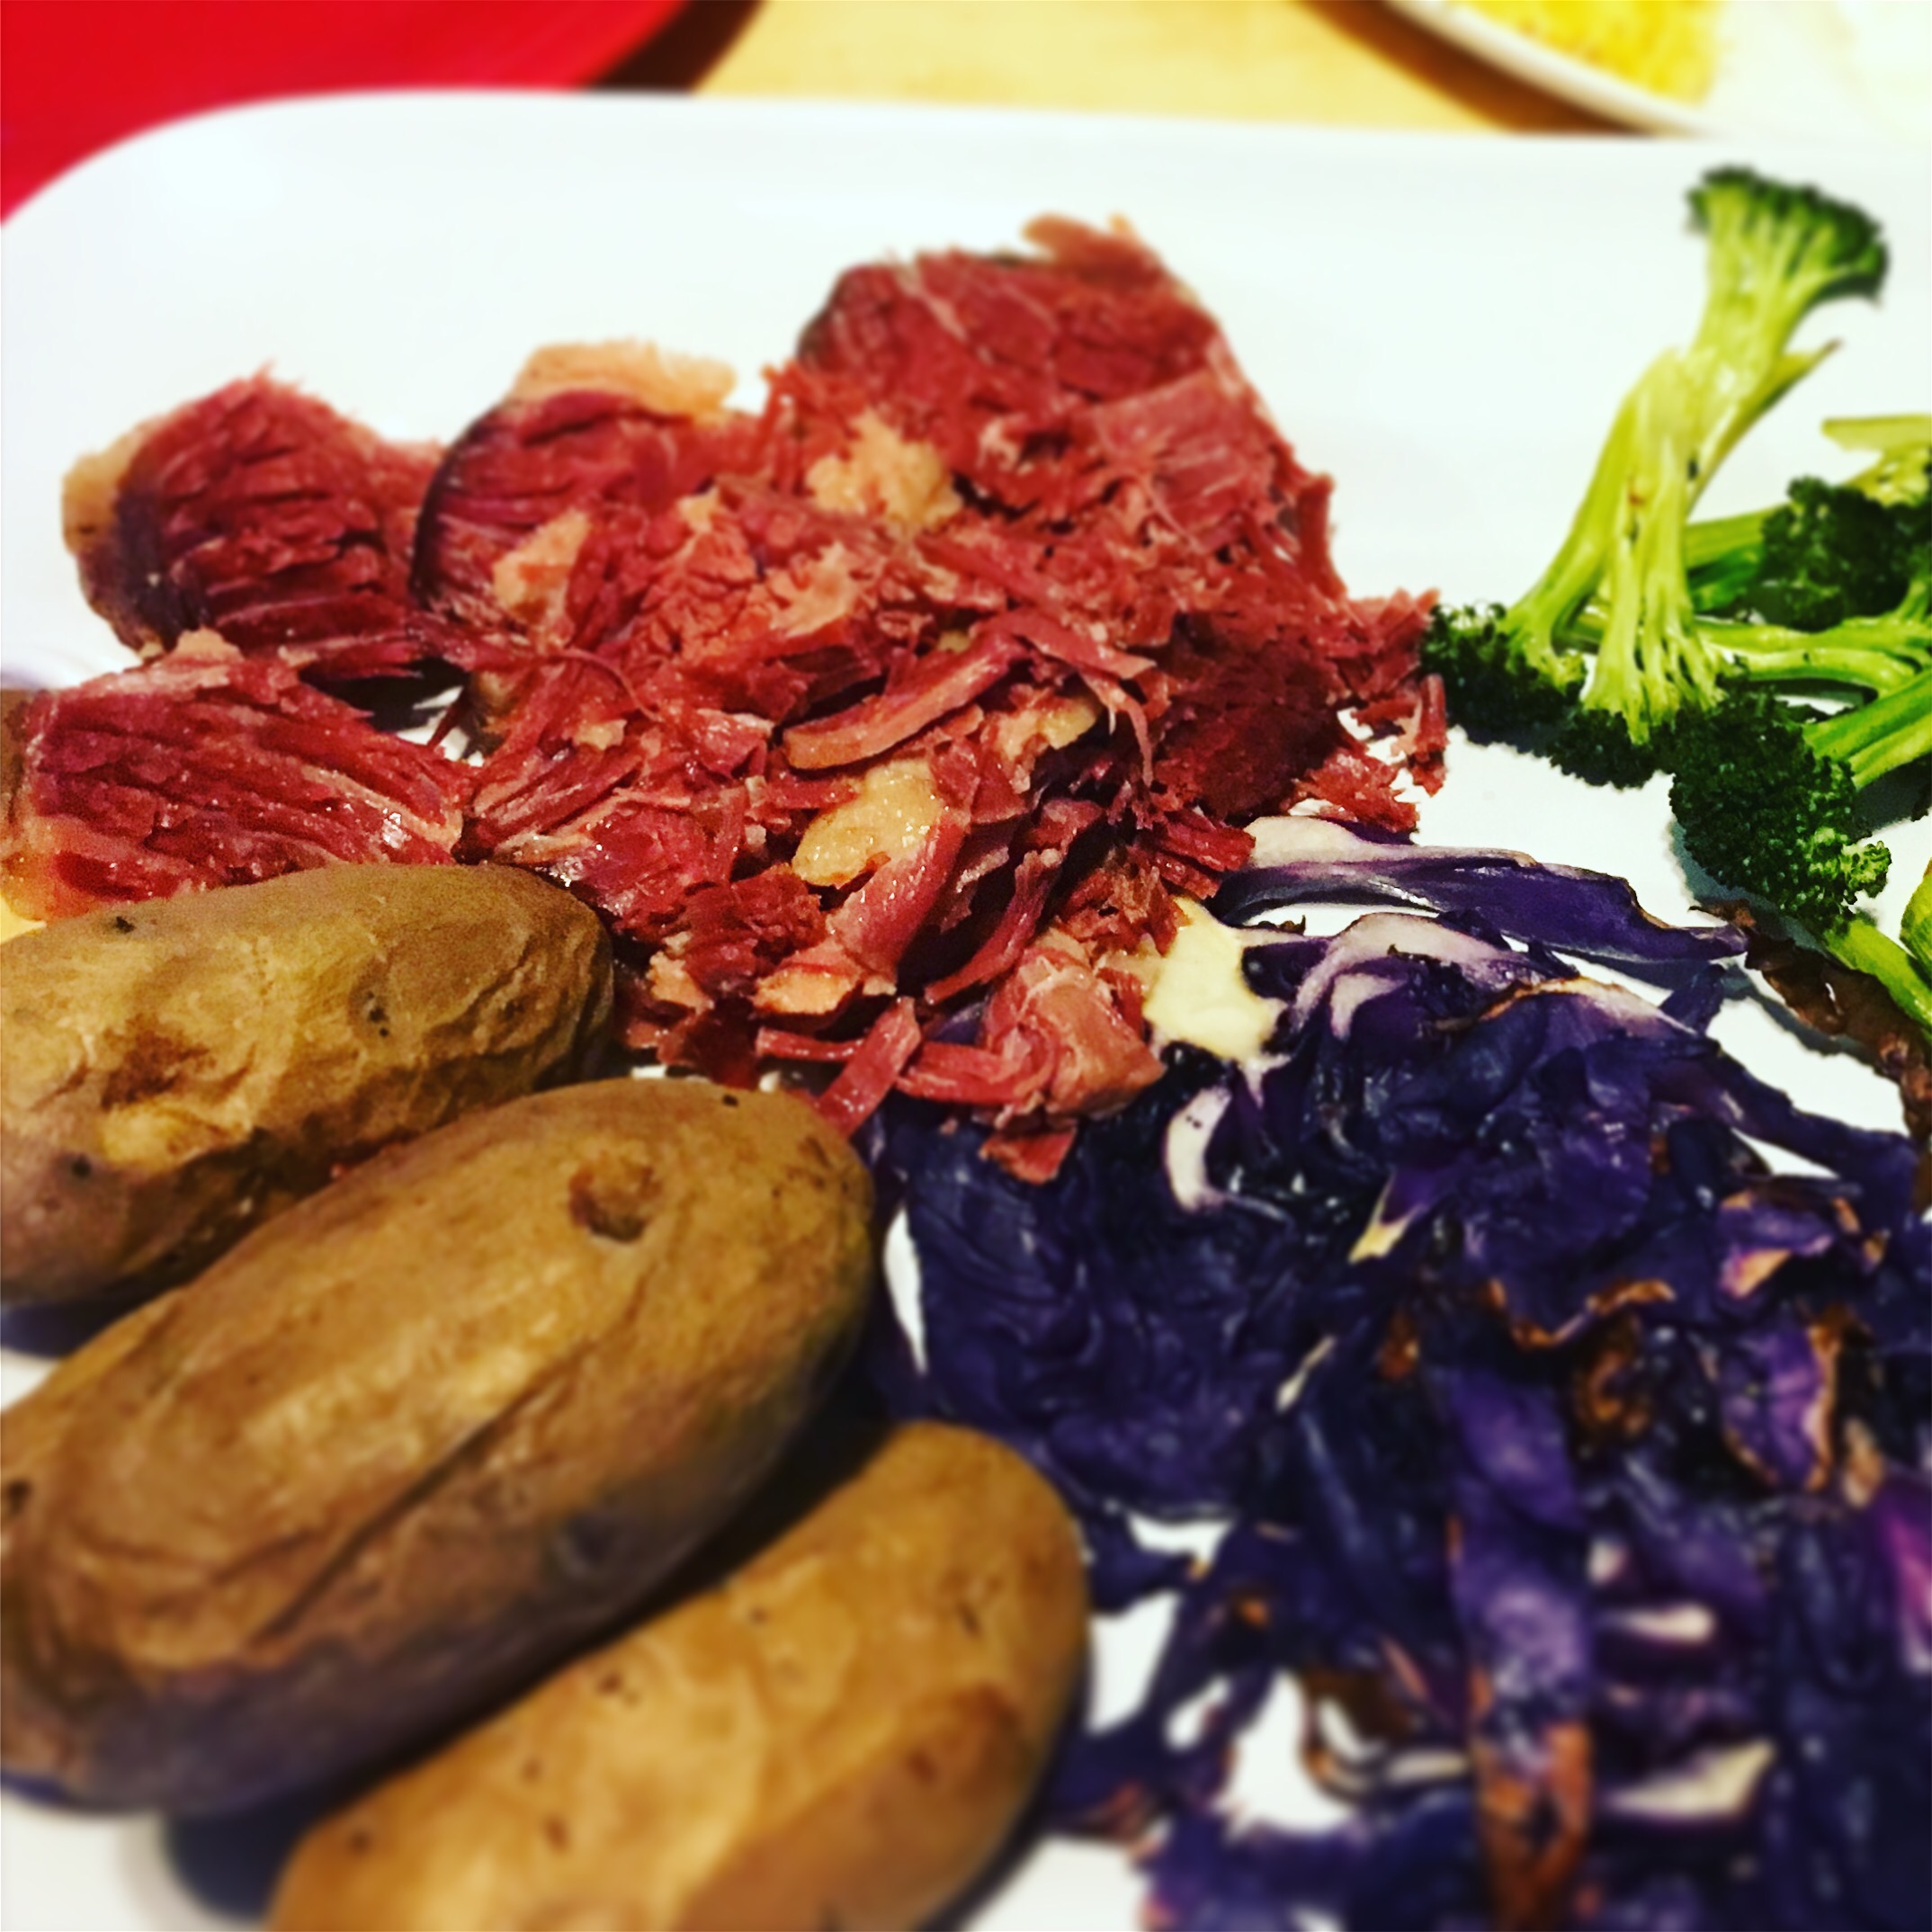
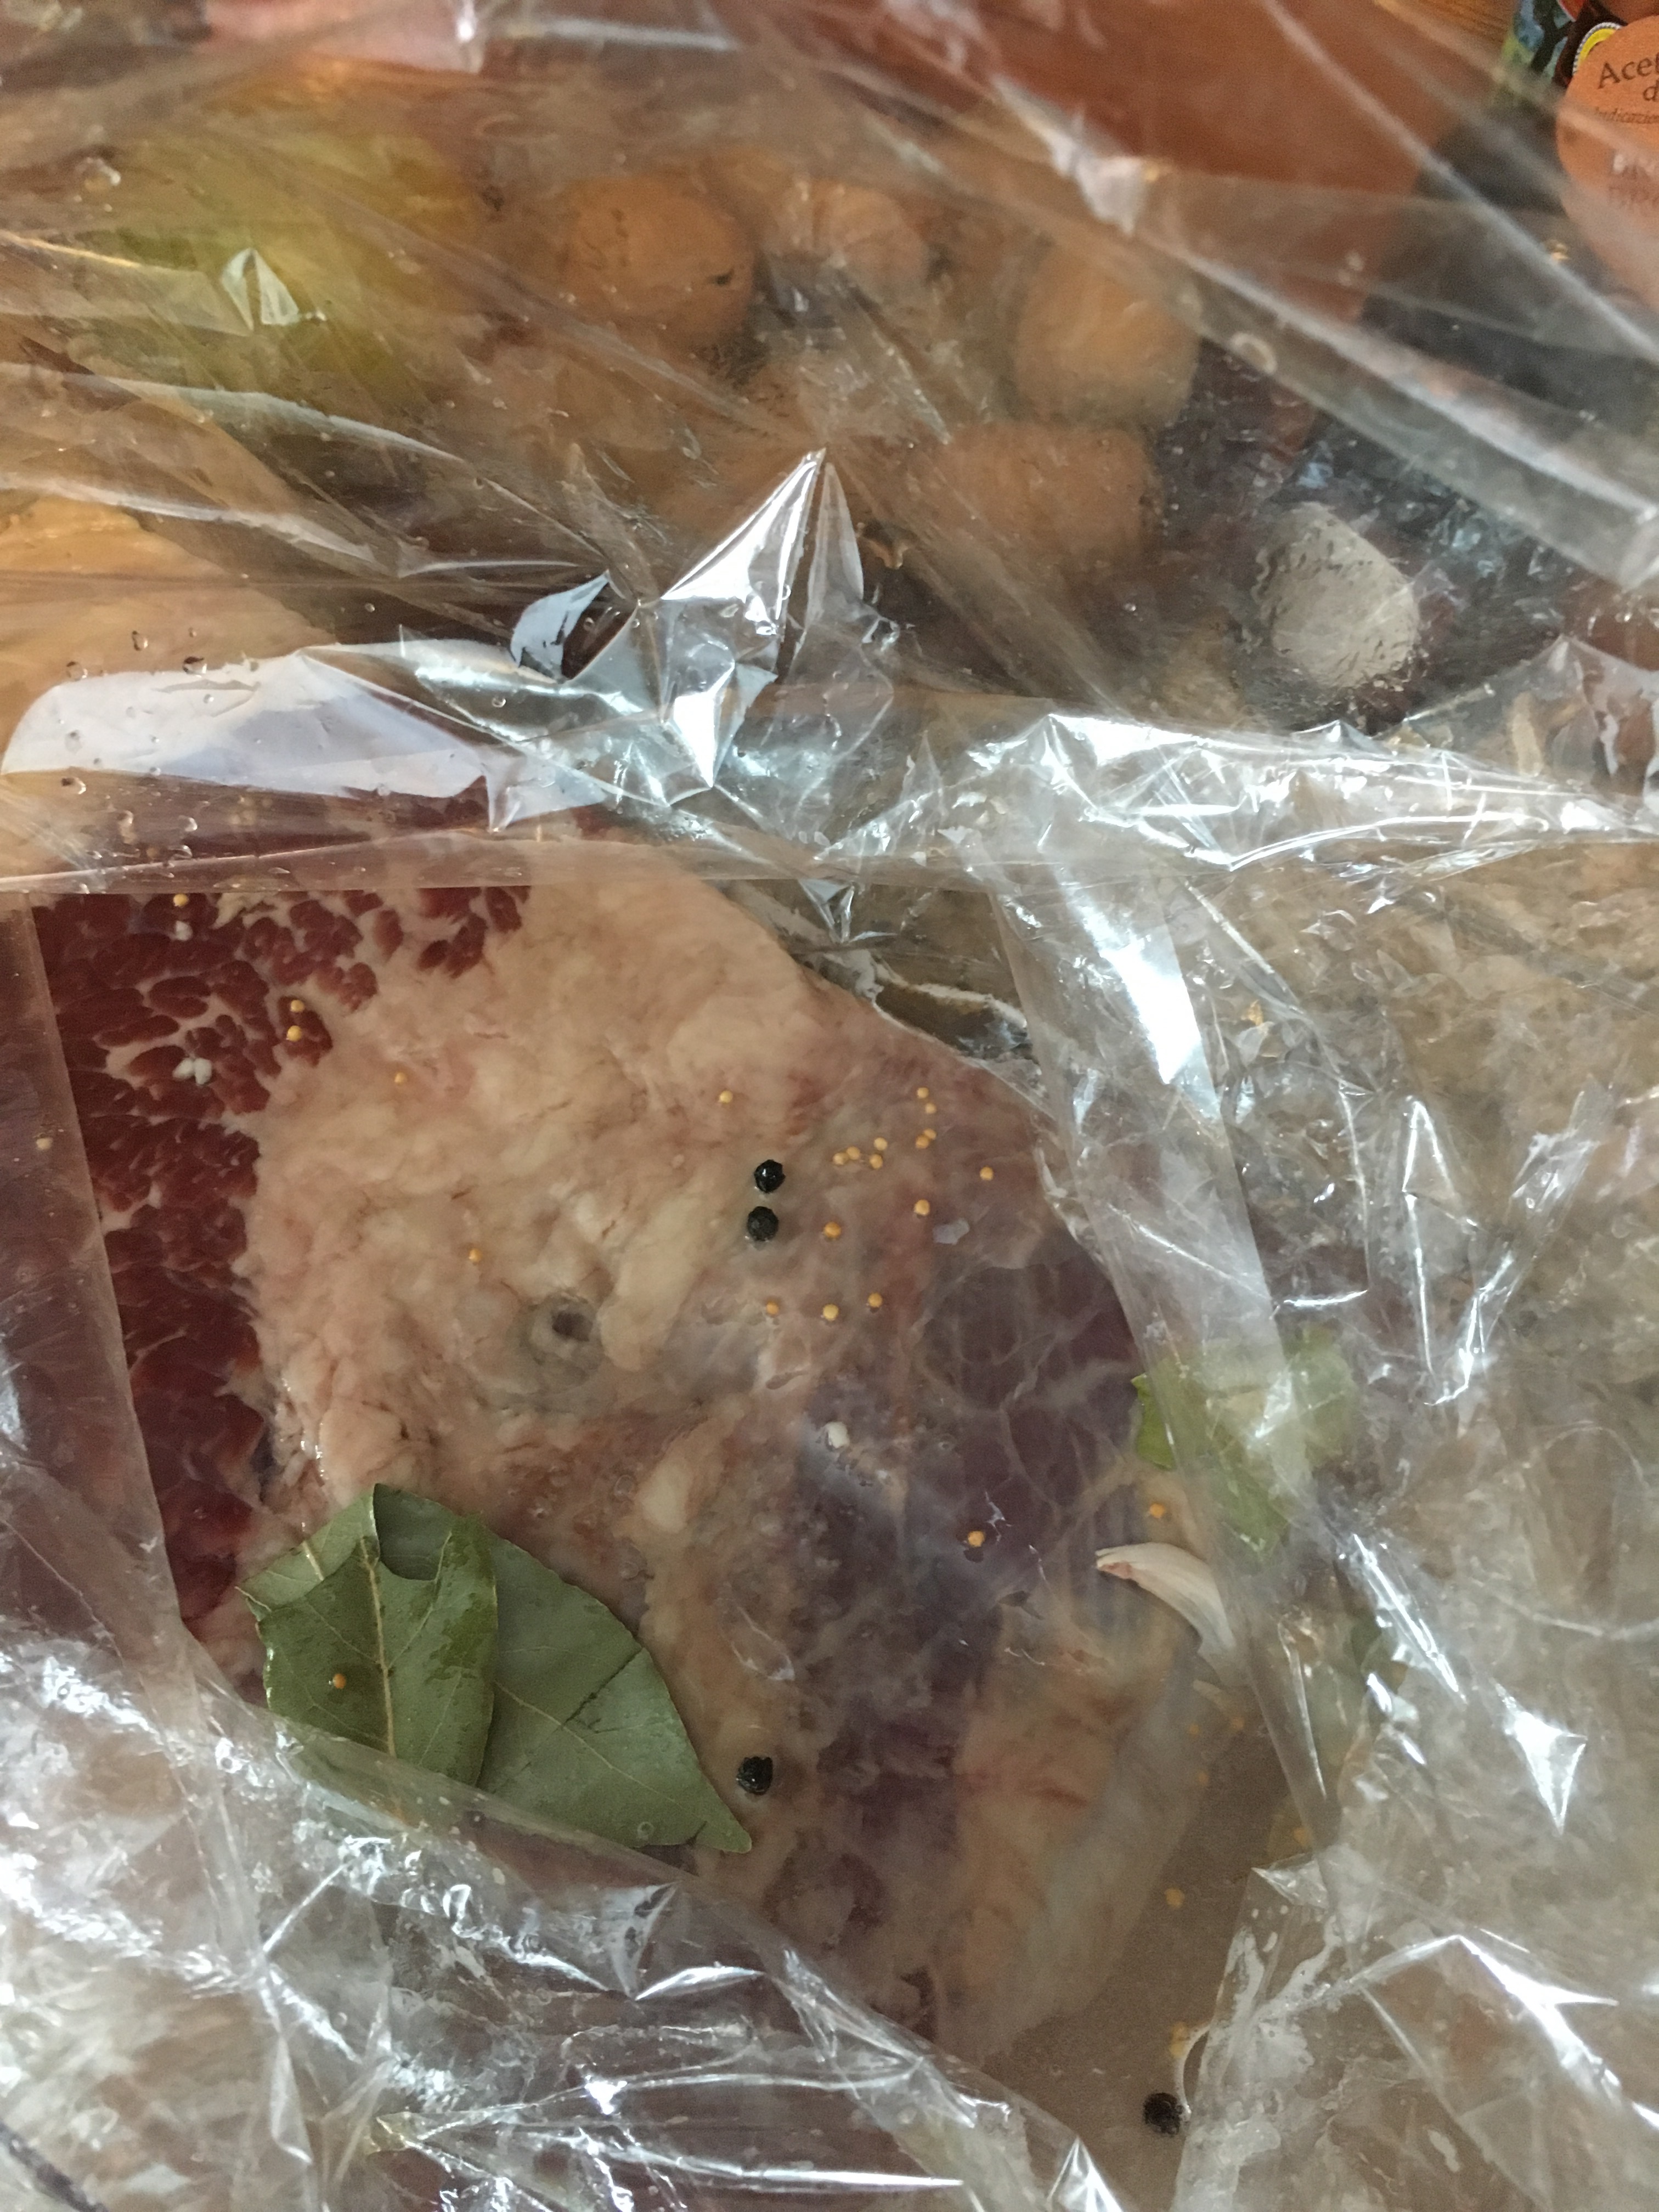
In celebration of St. Patrick, and the Classic Irish American hearty dish of Corned Beef, I set out recently to corn a grass fed beef brisket. If you’ve never tried it, you really should, it’s super simple and only requires time. The simple brine heavy on the salt, bay, mustard seed, peppercorns and cloves can marinate the meat for 2-6 days refrigerated. When your ready to cook, 8 hours on low in the crockpot produces a fork tender richely corned beef perfect for a rowdy group of celebrators.
As with most holiday fare, I did a little research on corned beef, because history always is interesting how a tradition becomes a tradition in relation to food. In Ireland, although plentiful due to their revered “sacred” status from Gaelic times and prized dairy production, cattle in Ireland were not consumed for meat until the beef-eating British came to rule. The British married their love of beef to Ireland’s quality salt (of corn kernel-size, hence the name “corned”) to produce “corned beef.”
The area of Cork, Ireland was a great producer of Corned Beef in the 1600’s until 1825. It was their chief export and sent all over the world, mostly in cans. The British army sustained on cans of Cork’s corned beef during the Napoleonic wars. Over time, with Irish beef being mostly exported, it was too expensive for most, so Irishmen who owned cattle were raising them predominately for their dairy products, from which butter, cheese and cream could be obtained. Sheep were raised as a source of wool and hogs were one of the only livestock species raised by the peasantry for consumption. Salt pork and bacon became the staple protein more common of Irish tables. In talking with my Irish relatives, the meal they most crave on St. Patrick’s day and when traveling abroad is bacon and cabbage. After the Great Famine, and many Irish found themselves in American, the availability of brisket was much more affordable and accessible to the recent immigrants from Kosher butchers, and became more common in traditions.
As my slow cooked Grass Fed corned beef approached readinesss, I decided to prepare the cabbage and potatoes separately. I love the sweetness of roasted cabbage, as do my kids. It’s easy enough to slice a whole cabbage into 1/2 inch rounds, rub all over with garlic cloves,place on a olive oil greased baking pan, and roast at 400 F degrees flipping once, for about 20 minutes. If you have a sweeter balsamic vinegar, drizzle it over the cabbage once it’s cooked.
For the potatoes, I roasted with the cabbage whole at 400 F degrees for 30 minutes, removed and pierced with a fork, cooking another 20 minutes. You get a flaky potato if you wait to pierce, because you trap the steam into the potato while it bakes and then realease it during the second half of the cooking time to allow it to get flaky. We served these baked potatoes with extra Kerrigold Grass fed butter, crispy bacon and chives.
Feast for the Irishmen
Since St. Patrick’s day falls within Lent, and meat is given up during that time for most, this holiday allows for a break in the fast and a time to celebrate with family, friends, music, stories and food. So wether you make a corned beef, Irish Stew or crave bacon and cabbage, may it warm your soul and bring you closer to the ones you love.
Let corn for 2-6 days Corned Beef
4-5lbs grass fed beef brisket
2 quarts water
1 cup tender cure salt
1/2 cup vinegar (white or apple cider)
4 tablespoon sugar
3 bay leaves
1 teaspoon whole black peppercorn
1/2 teaspoon mustard seed
Pinch whole clove
4 garlic cloves, smashed
Trim beef of some fat, I tend to leave the fat intact to add flavor.
Place all ingredients in a large bag, I used one meant for turkeys I had around. Or you could use a ceramic crock and cover with beeswax paper if your like most Californians and avoiding the single use plastic bags.
Allow the grass fed beef brisket to corn for 2-6 days, turning every day.
Once it’s corned to your liking, remove the brisket, rinse it and place in a crockpot. Discard the brine.
Next cover brisket with water, and add a fresh bay leaf and some garlic. Then cook on low for 6 hours or longer for a larger brisket.
When ready to serve, allow brisket to rest on a cutting board for 10 minutes before slicing.
Autumn is in full swing, and so are the temperatures, but whose to complain when you can hike all day and have a cozy fire and chili at night?
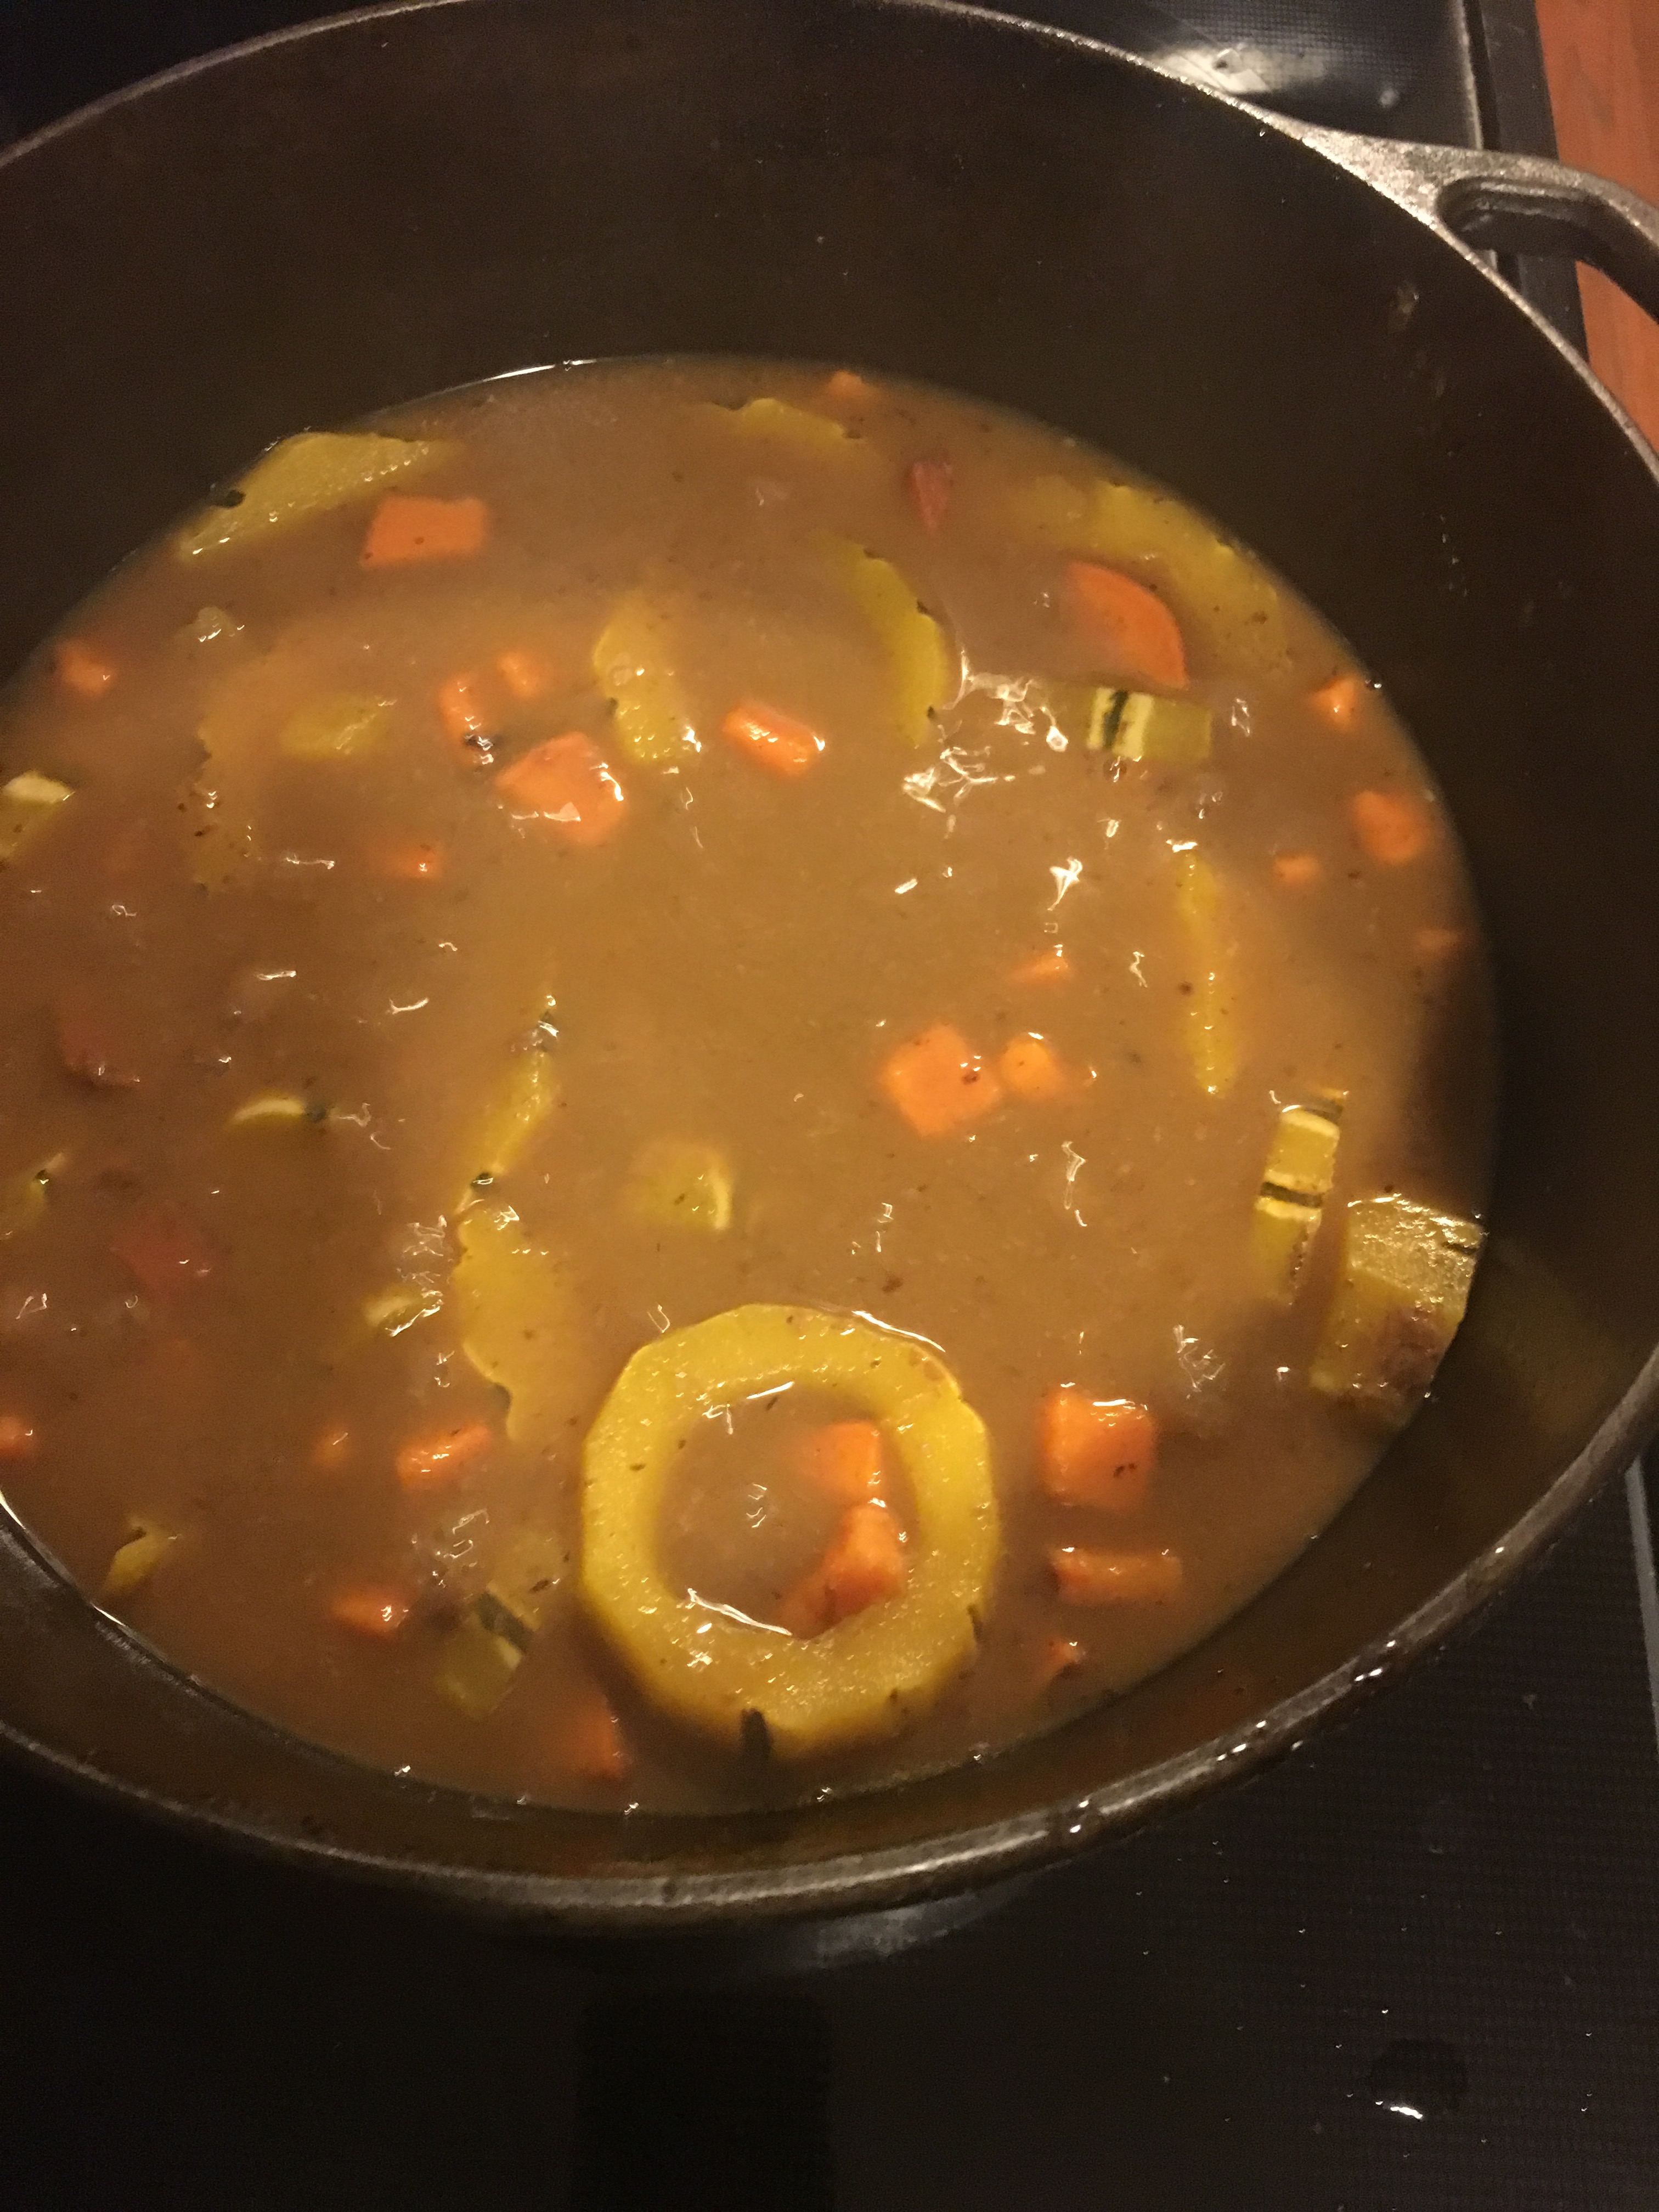
This recipe blends the sweetness of delicata squash, sweet potatoes or yams depending on your preference, and pinto beans lightly simmered in a rich homemade grass-fed beef bone broth. Rich in minerals, fiber, protein and just a delight of velvety goodness. Cumin gives it a complexity, and while you could add some heat with cayenne and smoky paprika (next time), we chose to add some chopped parsley and feta to compliment the sweetness.
Have you cooked up your own batch of beef bone broth lately? It’s rather simple. Order up a bag of bones, $6 for 3 large bones. Heat oven to 425 add bones to a pan and roast 30mins. Your house will smell amazing. When they are finished, place in large crock pot and full with water. You can add a onion, carrot and celery-but I usually just do the bones. Allow to cook on low for 36 to 48 hours. Add water to top if it starts to get low after first 12 hours. I usually start a batch in the evening so I can refill water before I leave the next day, and then it’ll be ready at dinner time the following day. And that’s it. Give Fido the bones after they’ve cooled, save 16 ounces for the chili and freeze up the rest.
Taking the time to slice the delicata into rings makes for a fun presentation!
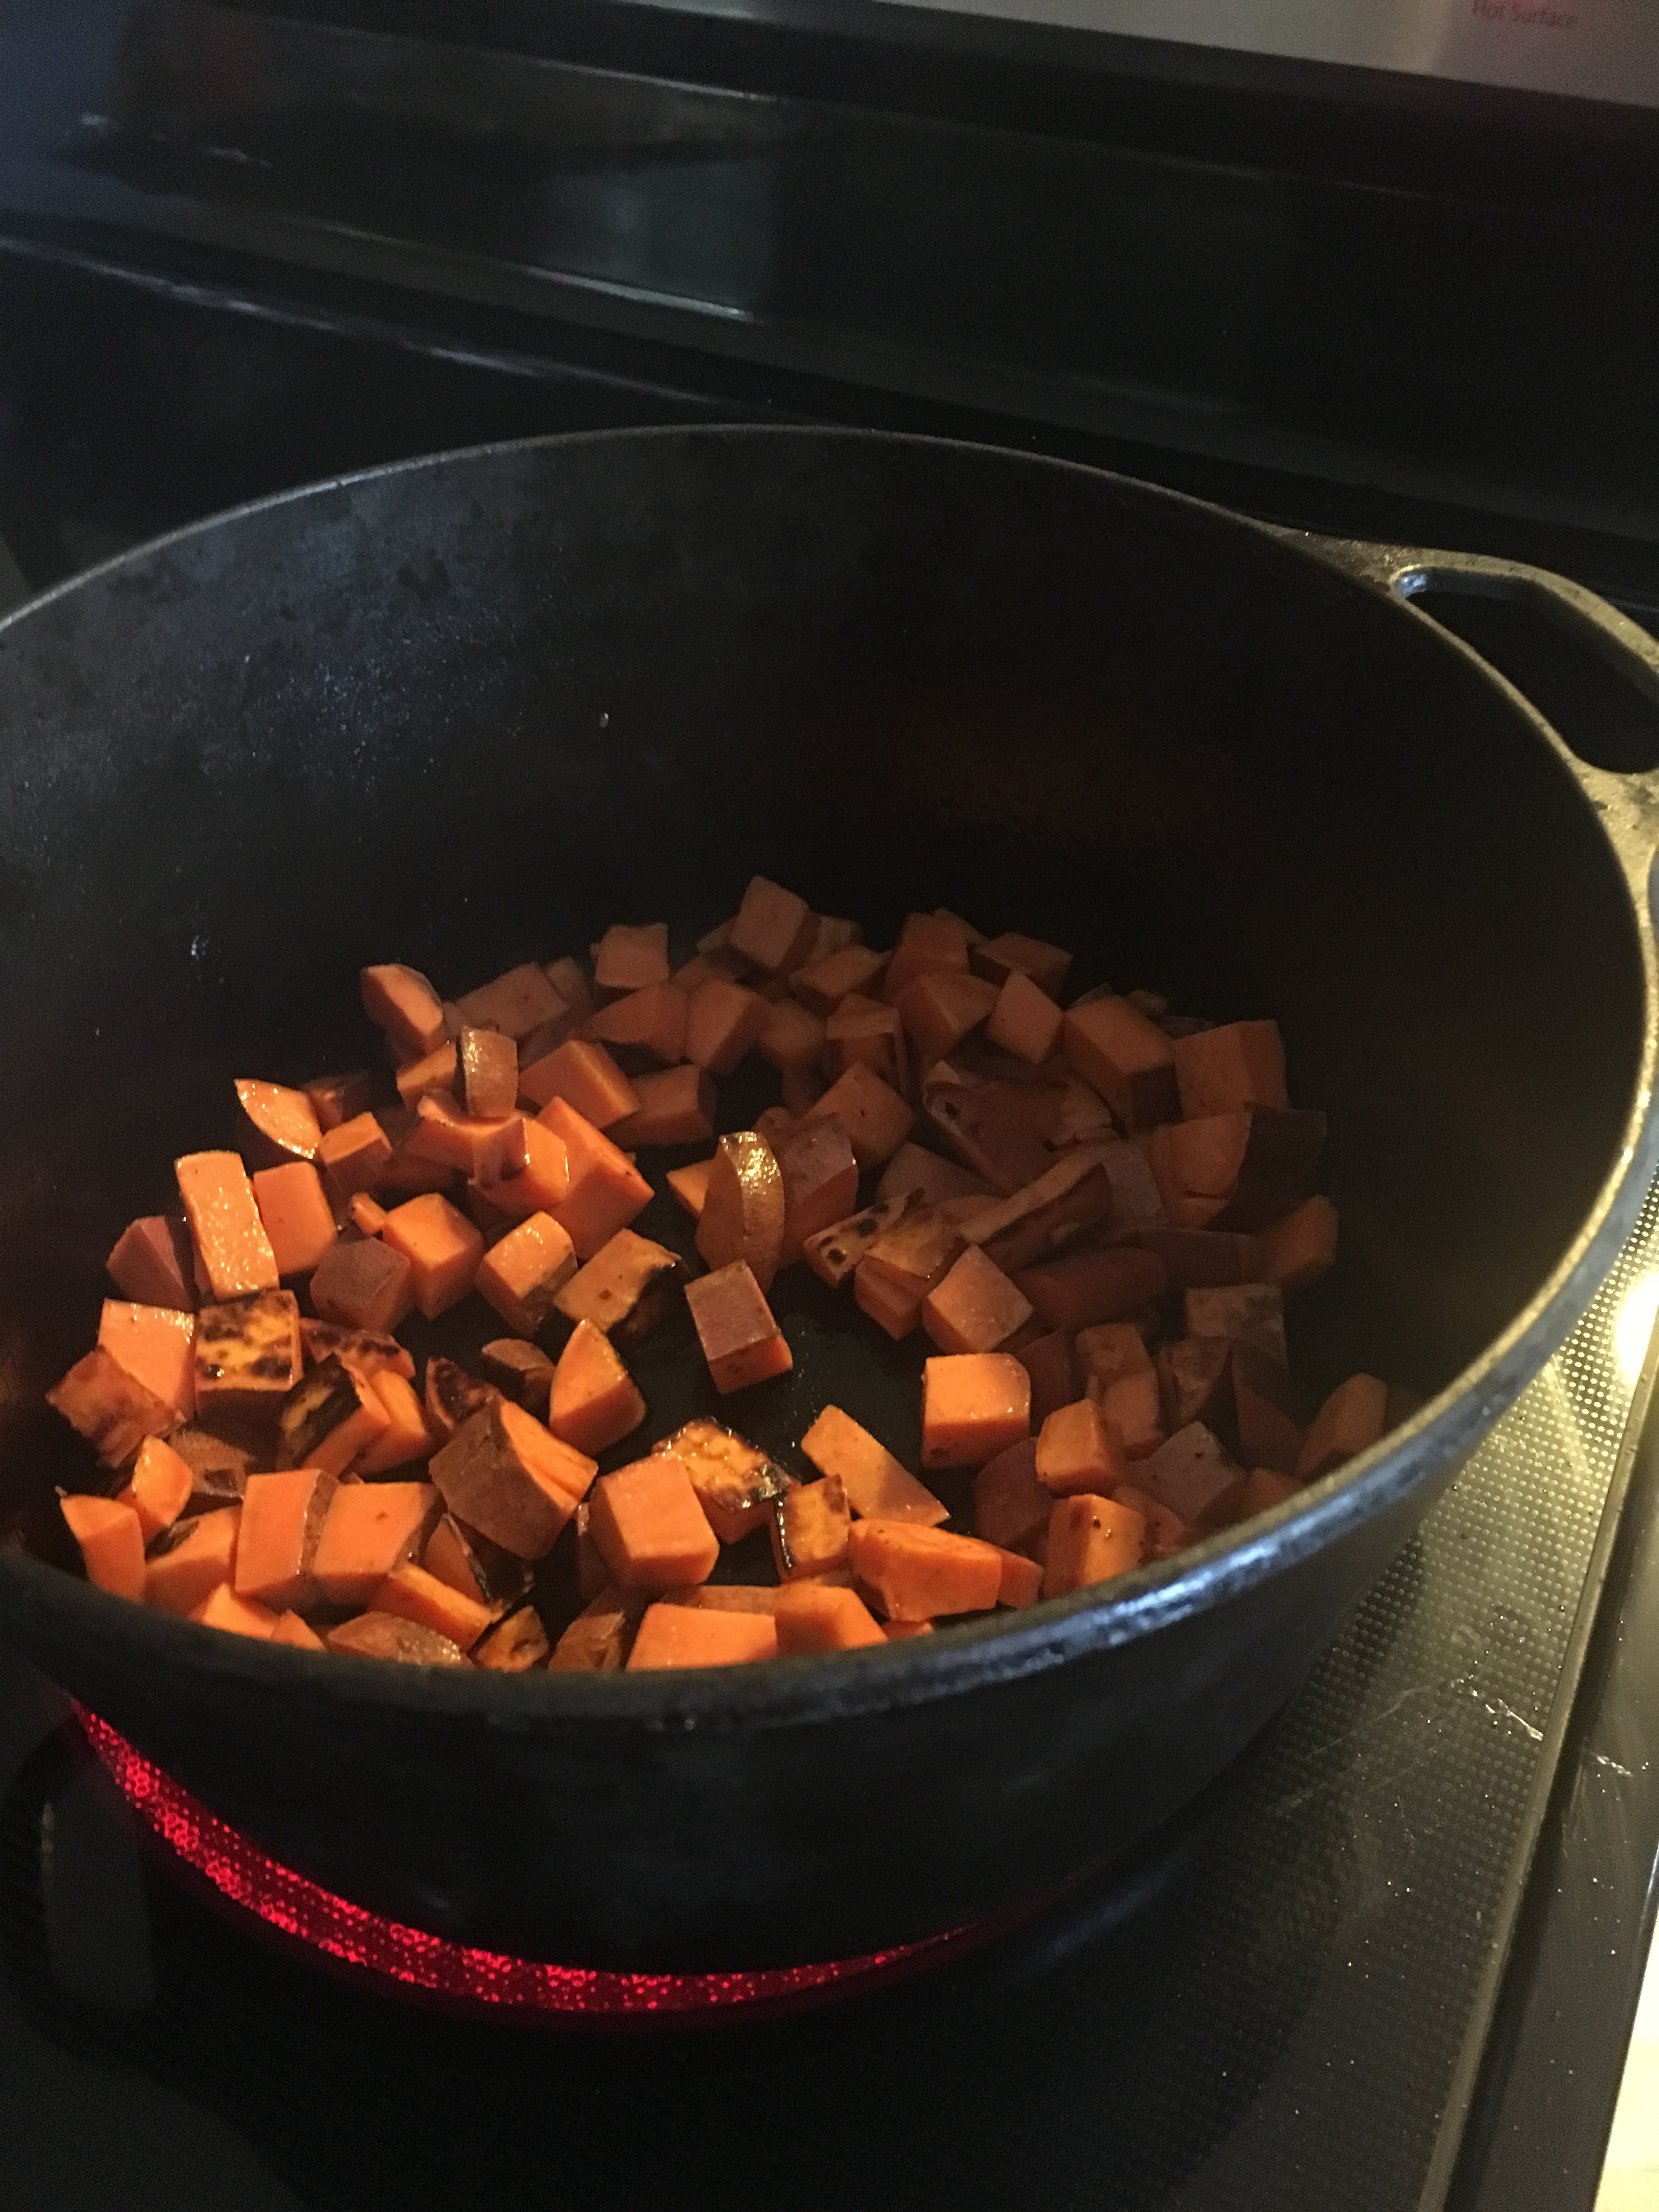
I like to brown up the sweet potatos in a little oil (or rendered pork fat) first, it’s a quick way to get a roasted flavor out of the sweet potato.
Autumn Squash and Beef Bone Broth ‘Chili’
1 sweet potato
1 delicata Squash
2 cups prepared pinto beans
16 ounces beef bone broth
1 Tablespoons cumin
1/2 Tablespoon salt
Parsley chopped and feta to garnish
First, dice up the sweet potato and drop into your cast iron or stainless steel pot that has been heated and oiled with 3 T olive oil or rendered pork fat. (I prefer the pork fat, good at adding fat and flavor to a dish) Brown the potato up about before adding to the pot.
Next, take the time to peel the delicata Squash. The skin is rather thin and edible but since the Squash needs to break down a bit during cooking it may throw off the texture of the chili. Then slice the squash into rings, some thinner some larger. If you have a few larger ones that don’t break down while cooking the chili, they are fun for presentation! Add your squash to the pot.
Lastly, add the bone broth, beans, cumin and salt and give a good stir. Place the lid on and let the chilli simmer for a good 30 minutes to allow the flavors to blend and it to get nice and velvety.
Ladle your chili into bowls giving each guest a bit of parsley and feta to garnish.
Truckee and Tahoe City deliveries are scheduled for November! Yes, We will deliver in December too!
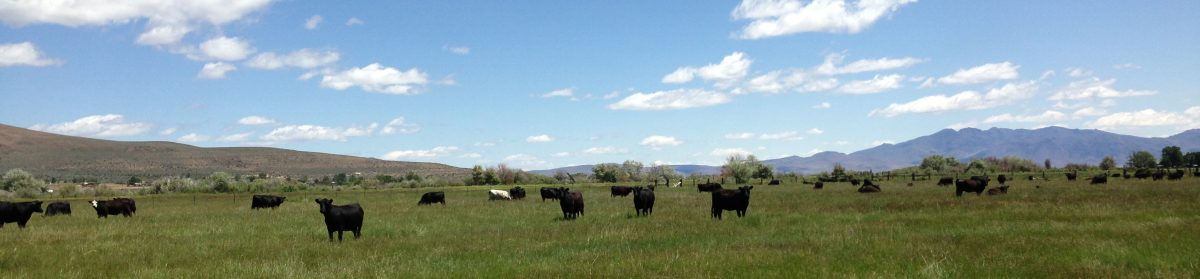
Grass-fed, Grass-Finished Angus Beef.
Grass-fed Lamb.
Pastured Pork.
Be sure to jump on over to Hole In One Online Ordering and get your orders in for the next delivery schedule. Remember no fee. No minimum orders. Click here!
Thank you to our customers who placed orders in Tahoe City. It was a beauty of a morning!